Pages

Thursday, February 7, 2013

Valentines Mantel Goodness


With all the projects I've been doing everyday, I have a lot of Valentines decor and had no idea what to do with it without filling the entire house with pink, flowers and hearts. This way all of the Valentines things are all on display I'm one place and will be easy to tidy when the holiday is over!


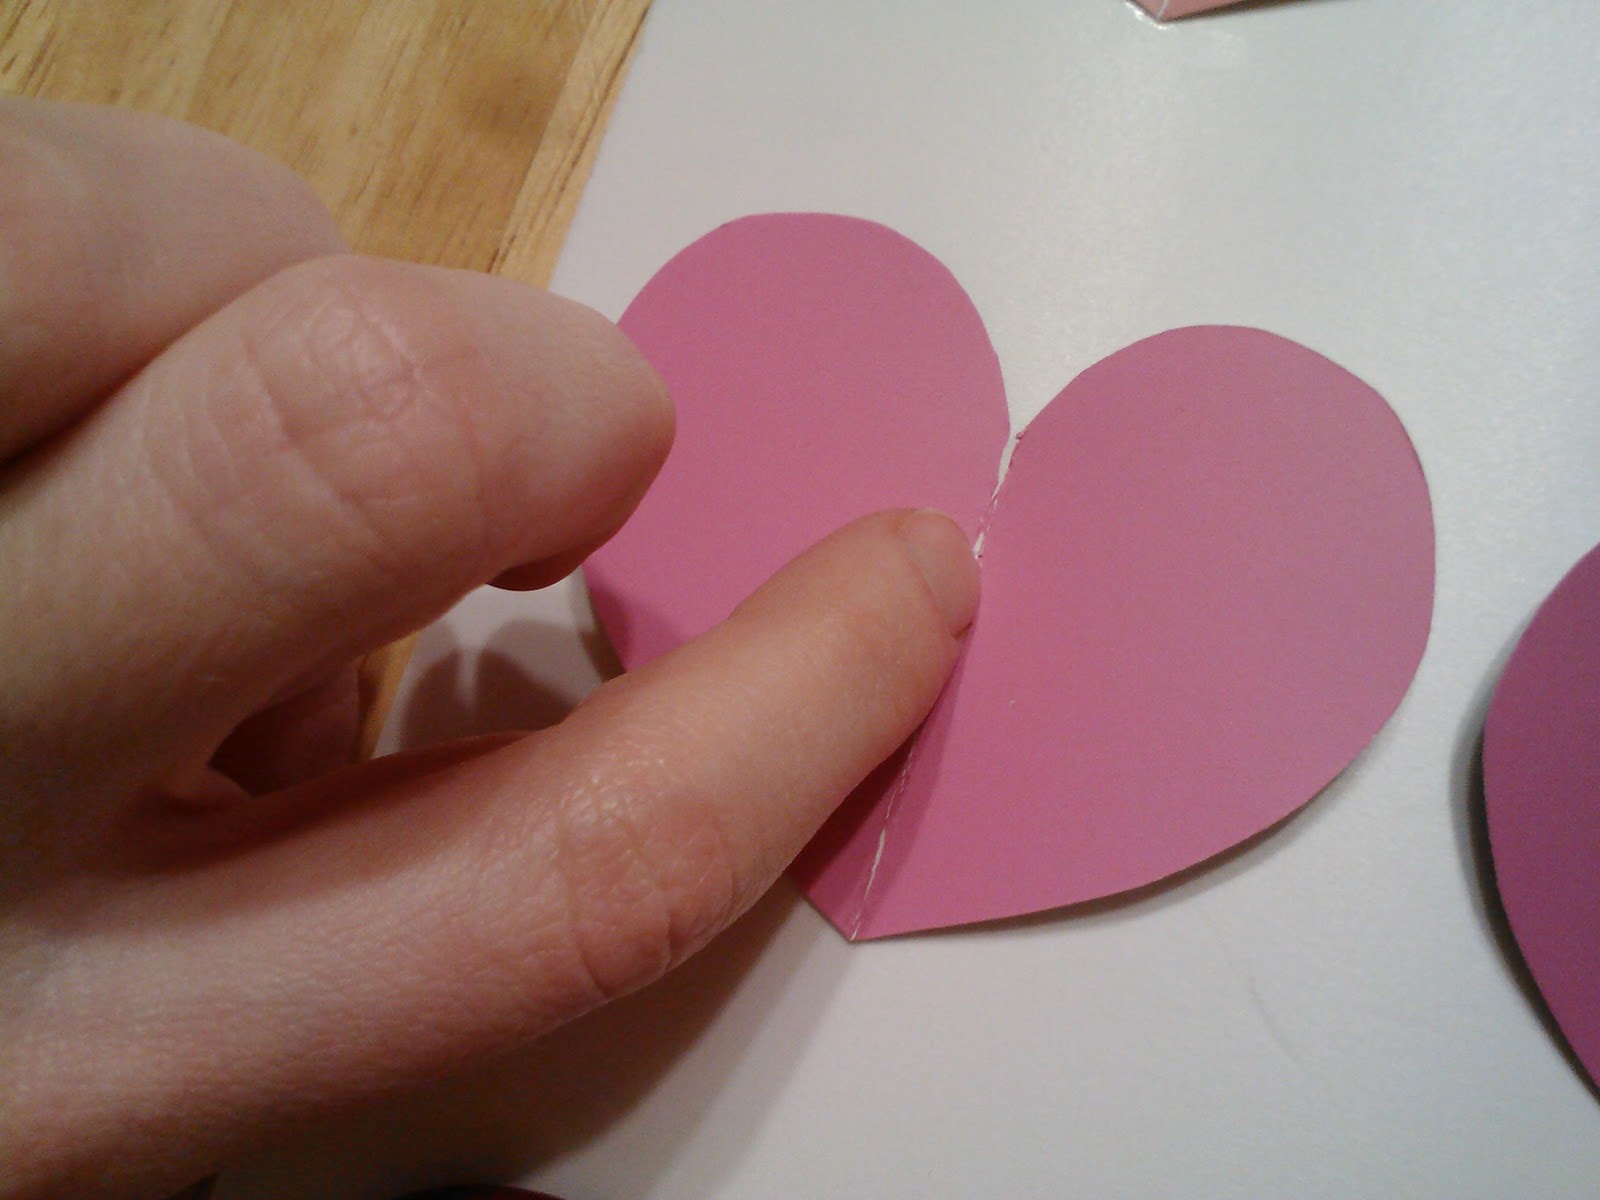
You've all seen, and maybe even made, the Ombre Heart Art.


The stuffed pouch hearts are the same kind that I sell on my Etsy shop.


I had hugs and kisses left over from the hugs and kisses cookies that I put in vases with some shiny red decorative grass and a Grosgrain ribbon bow tied around them.


The paper flowers I posted a couple days ago.
I can't remember where the red candle came from, but it was perfect with everything else.


 The X and O were a spur of the moment project with cardboard letter forms and little squares of tissue paper glued all over them.


The pink and white flower garland was made out of coffee filters and string. To make the pink flowers pink I dyed them with food coloring and to dry them quickly I baked them flat on a cookie sheet at 250 until they were completely dry. Then folded the filters in half, scalloped the edges, formed my flowers and tied them on string.
 
Check back tomorrow for another tutorial for 14 Days of Valentines and on Saturday my beautiful and crafty friend Hailey will be guest posting with her Valentines tutorial!

~Allison

Cutie Patootie Fabric Bow


I've been wanting to make some bow ties for my little man for quite some time and now that I'm doing this series I have no excuse not to make them, so here's how I did it. Oh, and these bows can be adjusted for little or BIG guys and they can, of course, be made to wear as hair bows for you or your daughters!


Here's what you'll need:
~Fabric
~Handsewing Needle, or sewing machine
~Thread
~Scissors
~Measuring Tape
~Iron
 
Decide how big you want your bow to be, double the height and cut your fabric. For mine, I made them 5 inches wide and 2.5 inches tall, so I cut my fabric out to be 5 inches wide and 5 inches tall. If you want a double bow, you'll cut another strip like the first one just make it an inch smaller on the width and height. You'll also want to cut a strip of fabric about 2inches wide and at least 3inches long, this is the piece that we'll use for the middle of our bow.

Once you have the main piece cut you'll fold your strip of fabric in half, right sides together and sew 2 of the 3 open edges closed. Leave the last edge open to turn your fabric right side out.

After you do this you'll sew your last edge closed and iron flat.

Now take the small strip of fabric we cut for the middle part and iron it in half so you have a 1x3inch strip.

Open it up and now iron the edges halfway to the midpoint on both sides. All you need to do now is sew it shut.

Here's the best part, take your main piece and pinch it in the middle.
Wrap the middle strip around your pinch and sew in place.

And you're done with your bow! Now slip an alligator clip in it to make it a hairbow, or add elastic to make it a bowtie!


~Allison

Tuesday, February 5, 2013

Paper Flowers :)


I love the way paper flowers look and the fact that they don't wilt and will stay vibrant and beautiful for a very very long time, well unless your children get into them! My plan for today's post was to write up a paper flower tutorial, but after looking at all the wonderful posts already done by so many talented people it seemed to me that they would be much better at showing you how it's done. So, I'm going to share with you some of my favorites with links to their tutorials and then in a few days I'll talk about what we can do with our flowers!

These are so cute!


They look just like carnations and how EASY?!


Isn't that so pretty?


So simple and pretty.


I love the different flowers together :)


I'll be making some of these beauties for some projects in a few days so make a few too and we'll do it together! Hope you enjoy!

~Allison

Monday, February 4, 2013

Little Hugs and Kisses Cookies


Typically, my family makes these cookies for Christmas, but I LOVE them! And these are perfect to give out as Valentines because they've each got a hug or a kiss on them.

I adapted my recipe from this one here.

Ingredients:

~2 Cups All Purpose Flour
~1/4 Cup Milk
~3/4 Tsp Baking Soda
~1/2 Tsp Salt
~1 Stick Softened Butter

~1 Cup Packed Brown Sugar
~1 Tsp Vanilla Extract
~2 Large Eggs
~1 Cup Chopped Nuts (optional)
~1 Bag of Hershey's Kisses and Hugs

Cream butter and sugar together until light; add vanilla and eggs, beat well.


Dissolve soda in milk; add flour, salt, and nuts.


Drop rounded teaspoons, no bigger than the size of a quarter, onto a greased cookie sheet 2 inches apart

Put your cookies in the oven for 8 to 10 minutes, until lightly brown.

About 1 minute before the cookies are done, put your kisses right in the middle of each cookie and press lightly. The hugs will melt too quickly if you put them on before their done, so you should wait until you take your cookies out to put your hugs on.


Once they're completely done the kisses and hugs should maintain their shape but be bonded to the cookie. Now enjoy, or wrap your cookies and give them to someone who needs a kiss or a hug!


I have two little girls that approve of these little hugs and kisses cookies!

~Allison

Sunday, February 3, 2013

Ombre Heart Art

I have a sweet husband who thinks of me when he's randomly roaming the isles of Walmart for heavy duty starch. He picked up a HUGE stack of paint samples for this project, and a few more I have planned for other days!

I know you all have seen these before, maybe even an ombre style one, but mine is super easy and little something to liven up your Valentines decor(well if you have Valentines decor). I like the way mine turned out and I'm sure you'll like yours too if you choose to make one for your house!


Here's what you'll need:

~Paint sample squares (you know the little sample colors that you can take for free)
~Foam board, poster board, canvas or any other sturdy background you choose(I used foam board)
~Glue
~Scissors

Now that everything is gathered up, we can get started.


First you'll want to figure out how many hearts you want, this will determine the size of your hearts and the amount of rows/columns. Once you've done that you can get started by cutting out your first heart.
I always cut my first of anything a little bit bigger than I want just in case it ends up looking a little funky, that way you can always trim it down to make it look better.

Fold one of your papers in half and cut it out. Don't be scared of messing it up, it was free and you can get more!


You'll use your first cutout heart as a guide for your other hearts. If you're smart you'll just trace and cut, but if you're like me you'll hold the first heart against the other folded papers to cut them all out and then realize "This could have been SO much easier."


After you cut all the hearts you want, arrange them in the manner to which you would like them permanently attached to your background. Try to stay in the same level of color saturation for each row, progressively getting lighter, and it'll turn out great.


When all of your hearts are just how you want them, start gluing them down. I started at the bottom and made that row as straight and as even as I could without actually measuring anything (I'm lazy).


From there you'll want to do the top row as even as you can to the bottom. It's easier to line your middle hearts up when you have a top and bottom guide to work with; unless you measure, this will be your best bet.


You've got all of your hearts glued to your background and you're done, or you can put it in and glassless frame and your done! Either way it's a cute, simple, EASY way to add a little love to your home.


Hope you enjoy!
~Allison

Valentine's Dress T-shirt Refashion


My daughter has had this pink shirt for a few months and she wore it regularly until she spoiled chocolate milk down the front of it and stained it beyond what Shout could handle, so it became her Valentines dress and I'm going to show you how I did it!
Sorry took this picture after the elastic was on!

To stabilize the skirt, I sewed a thin strip of elastic all the way around the middle of the torso. Measure your shirt and when you add your elastic be sure to use a zigzag stitch so it will still stretch.


After I attached the elastic, I appliqued 3 hearts to cover all of those yucky stains.
I use heat and bond lite to keep my applique in place while I do a zigzag stitch around the edge s to prevent fraying. Go really slow with this or you'll end up with a very messy zigzag.

My right side is matte and my wrong side is shiny

Next you'll get your skirt material and place it right sides together sew it together to form a tube. Basically fold your rectangle of fabric in half and sew down the short open sides.

Now that you have your skirt fabric in a tube you want to line the seam up with the side seam of your shirt and pin. Find the middle of the front and back and pin those as well as the other side seam. Once you've pinned those you'll want to pin the midway point between those pins as well to make it a little bit easier when you're attaching the skirt.

When you're attaching your skirt, you'll want to use a zigzag stitch again so you can maintain the stretch, pull your elastic as far as you can from the front and the back of the needle and keep an even amount of stretch while you stitch. This will gather your skirt along the elastic and with this technique you don't need any closures to get it on and off your little girl.


Finally, when your skirt is attached, it's time to cut off the bottom of the shirt that's just hanging inside the skirt. Since my shirt was made of knit fabric, all I had to do was cut it off and my dress was done!


Notice you can't see a hem? I used my invisible hem stitch on this dress(sorry didn't get a picture). You can find a great tutorial here for invisible stitch, and a really awesome tutorial here for applique.

Saturday, February 2, 2013

What we've been up to and February!

My entire house is sick, including me.
Passed out!

 We're a pitiful bunch lately, everyone coughing and sneezing with fevers and the tissues always close by to wipe snotty little noses.
She would only eat pudding haha
 
I did get a couple things done in spite of our sicknesses. My husband cousin needed a poodle skirt for school and I managed to get a couple new things up on Etsy.
Sister Skirt... Brother Bow tie coming soon!

Ok now for February, I'm starting my first blog series, 14 Days of Valentines!

Since I missed yesterday, one of the days will have 2 posts. I'll also be having a guest host or two! I'm so happy about all of the exciting things happening around here!